Appearance
带你用vue写后台系列(配置插件篇)
1、js-cookie的安装和使用
(1) +js-cookie介绍
js-cookie是一个简单的,轻量级的处理cookies的js API,用来处理cookie相关的插件
(2)+ 安装
js
npm install --save js-cookie(3)+引入
js
import Cookies from 'js-cookie'(4)+使用
- 添加cookie
js
 // 创建一个名称为username,对应值为value的cookie

没有设置失效时间,默认失效时间为该网站关闭时

Cookies.set(username, value)

// 创建一个有效时间为7天的cookie
Cookies.set(username, value, { expires: 7 })

// 创建一个带有路径的cookie
Cookies.set(username, value, { path: '' })

// 创建一个value为对象的cookie
const obj = { username: 'ryan' }
Cookies.set('user', obj)- 获取cookie
js
// 获取指定名称的cookie
Cookies.get(name) // value

// 获取value为对象的cookie
const obj = { name: 'ryan' }
Cookies.set('user', obj)
JSON.parse(Cookies.get('user'))

// 获取所有cookie
Cookies.get()- 删除cookie
js
// 删除指定名称的cookie
Cookies.remove(name) // value

// 删除带有路径的cookie
Cookies.set(name, value, { path: '' })

Cookies.remove(name, { path: '' })
2、使用nprogress 全局加载进度条
(1)安装nprogress 全局加载进度条:
js
npm install --save nprogress安装成功以后就会提示我们:
js
added 1 package in 9s(2)引入
源使用其实是在项目的src下面的main.js里面
一般正常写在你的路由拦截器里面
我的在 permission.js
js
import NProgress from "nprogress"; // 导入 nprogress模块

import "nprogress/nprogress.css"; // 导入样式,否则看不到效果

NProgress.configure({ showSpinner: false }); // 显示右上角螺旋加载提示
使用前 
使用后 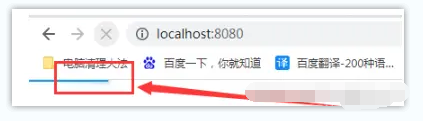
(3)使用
js
router.beforeEach((to, from, next) => {
    console.log(to, from, next,'路由加载中!')
    NProgress.start(); //开启进度条
	//满足要求后就可以next()
    next();
});

router.afterEach(() => {
    console.log('路由加载完成!');
    NProgress.done(); //完成进度条
});
3、安装 vuex
在vue2的项目之中我们还是使用vuex用来存储数据更加的方便,最主要的就是稳,毕竟已经有无数人为踩好了坑
- 安装vuex
这里安装部分我们就选择了3.6.0版本部分的
js
npm install vuex@3.6.0 //vuex状态管理器安装- 引入
在项目的入口文件(一般是main.js)中导入 Vuex 并安装,但是在复杂一些项目之中一般会写到store文件下的index.js文件里面,这里我的store就是
这里可以先看看我的目录部分 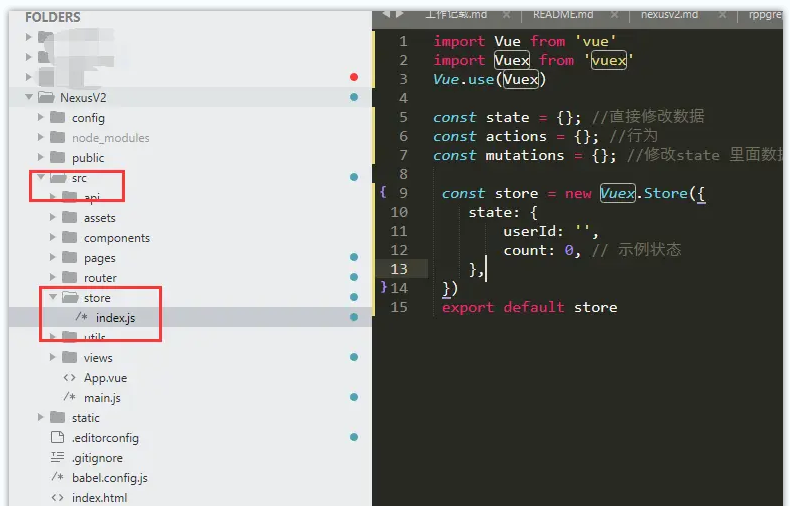
- index.js文件里面
js
import Vue from 'vue';
import Vuex from 'vuex';
Vue.use(Vuex);
试着存储一个状态
js
import Vue from 'vue'
import Vuex from 'vuex'
Vue.use(Vuex)

const state = {}; //直接修改数据
const actions = {}; //行为
const mutations = {}; //修改state 里面数据

 const store = new Vuex.Store({
    state: {
        userId: '',
        count: 0, // 示例状态
    },
 })
 export default store
接下来我们如果需要使用就需要用到仓库之中的状态和行为一起:
创建一个新的 Vuex store 需要定义 state、mutations、actions 和 getters。
js
const store = new Vuex.Store({
  state: {
    count: 0
  },
  mutations: {
    increment(state) {
      state.count++;
    },
    decrement(state) {
      state.count--;
    }
  },
  actions: {
    increment(context) {
      context.commit('increment');
    },
    decrement(context) {
      context.commit('decrement');
    }
  },
  getters: {
    getCount: state => state.count
  }
});- 使用
在组件之中其实我们是触发相对应的行为,然后触发行为去改变状态!
js
<template>
  <div>
    <p>Count: {{ getCount }}</p>
    <button @click="increment">Increment</button>
    <button @click="decrement">Decrement</button>
  </div>
</template>

<script>
import { mapActions, mapGetters } from 'vuex';

export default {
  computed: {
    ...mapGetters(['getCount'])
  },
  methods: {
    ...mapActions(['increment', 'decrement'])
  }
}
</script>
4、安装 sass-loader
在项目目录中安装vue-loader和sass-loader
js
npm install sass-loader5、安装 node-sass
js
npm install node-sass6、vue 配置 package.json
这边各种报错,朋友直接建议我去复制一下开源项目若依的,我建议你也是! package.json配置
js
{
  "name": "nexusvue",
  "version": "0.1.0",
  "description": "nexus",
  "author": "nexus",
  "private": true,
  "scripts": {
    "serve": "vue-cli-service serve",
    "dev": "vue-cli-service serve",
    "build:prod": "vue-cli-service build",
    "build:stage": "vue-cli-service build --mode staging",
    "preview": "node build/index.js --preview",
    "lint": "eslint --ext .js,.vue src"
  },
  "husky": {
    "hooks": {
      "pre-commit": "lint-staged"
    }
  },
  "lint-staged": {
    "src/**/*.{js,vue}": [
      "eslint --fix",
      "git add"
    ]
  },
  "keywords": [
    "vue",
    "admin",
    "dashboard",
    "element-ui",
    "boilerplate",
    "admin-template",
    "management-system"
  ],
  "repository": {
    "type": "git",
    "url": "https://gitee.com/y_project/RuoYi-Vue.git"
  },

  "dependencies": {
    "@amap/amap-jsapi-loader": "^1.0.1",
    "@riophae/vue-treeselect": "0.4.0",
    "axios": "0.24.0",
    "canvg": "^4.0.1",
    "clipboard": "2.0.8",
    "core-js": "3.25.3",
    "easemob-websdk": "^4.1.2",
    "echarts": "^4.7.0",
    "element-china-area-data": "^5.0.2",
    "element-ui": "^2.15.12",
    "ezuikit-js": "^0.7.2",
    "file-saver": "2.0.5",
    "fuse.js": "6.4.3",
    "highlight.js": "9.18.5",
    "html2canvas": "^1.4.1",
    "jquery": "^3.6.3",
    "js-beautify": "1.13.0",
    "js-cookie": "3.0.1",
    "jsencrypt": "3.0.0-rc.1",
    "jspdf": "^2.5.1",
    "normalize.css": "^8.0.1",
    "nprogress": "0.2.0",
    "quill": "1.3.7",
    "screenfull": "5.0.2",
    "sortablejs": "1.10.2",
    "vue": "2.6.14",
    "vue-amap": "^0.5.10",
    "vue-count-to": "1.0.13",
    "vue-cropper": "0.5.5",
    "vue-meta": "2.4.0",
    "vue-qr": "^4.0.9",
    "vue-quill-editor": "^3.0.6",
    "vue-router": "3.4.9",
    "vuedraggable": "2.24.3",
    "vuex": "3.6.0"
  },

  "devDependencies": {
    "@vue/cli-plugin-babel": "4.4.6",
    "@vue/cli-plugin-eslint": "4.4.6",
    "@vue/cli-service": "4.4.6",
    "@vuemap/unplugin-resolver": "^1.0.4",
    "babel-eslint": "10.1.0",
    "babel-plugin-dynamic-import-node": "2.3.3",
    "chalk": "4.1.0",
    "compression-webpack-plugin": "5.0.2",
    "connect": "3.6.6",
    "eslint": "5.15.3",
    "eslint-plugin-vue": "5.2.2",
    "lint-staged": "10.5.3",
    "runjs": "4.4.2",
    "sass": "1.32.13",
    "sass-loader": "10.1.1",
    "script-ext-html-webpack-plugin": "2.1.5",
    "svg-sprite-loader": "5.1.1",
    "unplugin-auto-import": "^0.14.4",
    "unplugin-vue-components": "^0.24.0",
    "vue-template-compiler": "2.6.12"
  },
  "engines": {
    "node": ">=8.9",
    "npm": ">= 3.0.0"
  },
  "browserslist": [
    "> 1%",
    "last 2 versions"
  ]
}
7、项目配置主题色
采取方法-----切换已定义好的css文件
js
定义:
:root {
  --ltbbac-color:#F0F0F0; /*最大的根目录背景色*/
  --ltbbtn-color:#F0F0F0; /*按钮背景色*/
  --ltbfont-color:#fff;/*字体背景色*/
}

使用:
background: var(--ltbbac-color);
color: var(--ltbfont-color);
① public 文件下新建样式文件
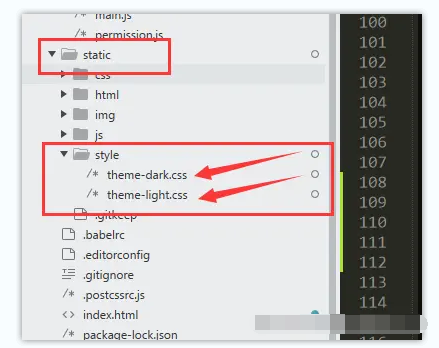
② 放入根主题样式
js
theme-dark.css

:root {
  --primary-color: #000; // 黑色主题颜色
}

theme-light.css
:root {
  --primary-color: #1890FF; // 黑色主题颜色
}
③使用
index.html 中引入
js
<link id="theme-link" rel="stylesheet" type="text/css" href="./static/style/theme-light.css" />- App.vue里面我们直接尝试背景色
js
#app{
    background: var(--primary-color);
}
④切换主题色
js
按钮
<el-button @click="switchTheme()">切换主题-太白</el-button>


// 切换主题函数方法
switchTheme(){
   document.getElementById("theme-link").href = './static/style/theme-dark.css';
},
切换以后 