Appearance
Swagger文档
1、安装Swagger相关依赖
javascript
express:
npm install @nestjs/swagger swagger-ui-express

yarn add @nestjs/swagger swagger-ui-express


fastify:
yarn add @nestjs/swagger fastify-swagger
2. 配置Swagger
在main.ts文件中进行Swagger导入SwaggerModule和DocumentBuilder来设置Swagger文档的基本信息。
javascript
import { SwaggerModule, DocumentBuilder } from '@nestjs/swagger'; // 引入swagger文档


 // 配置Swagger文档
 const config = new DocumentBuilder()
 .setTitle('API Documentation') // 设置文档标题
 .setDescription('The API description') // 设置文档描述
 .setVersion('v1.0') // 设置API版本
 .addBearerAuth() // 如果有认证机制可以加上认证
 .build();
// 创建Swagger文档
const document = SwaggerModule.createDocument(app, config);
// 配置Swagger UI,默认访问地址为 /api
SwaggerModule.setup('swagger', app, document);
ok,配置部分非常的简单
3、查看和设置
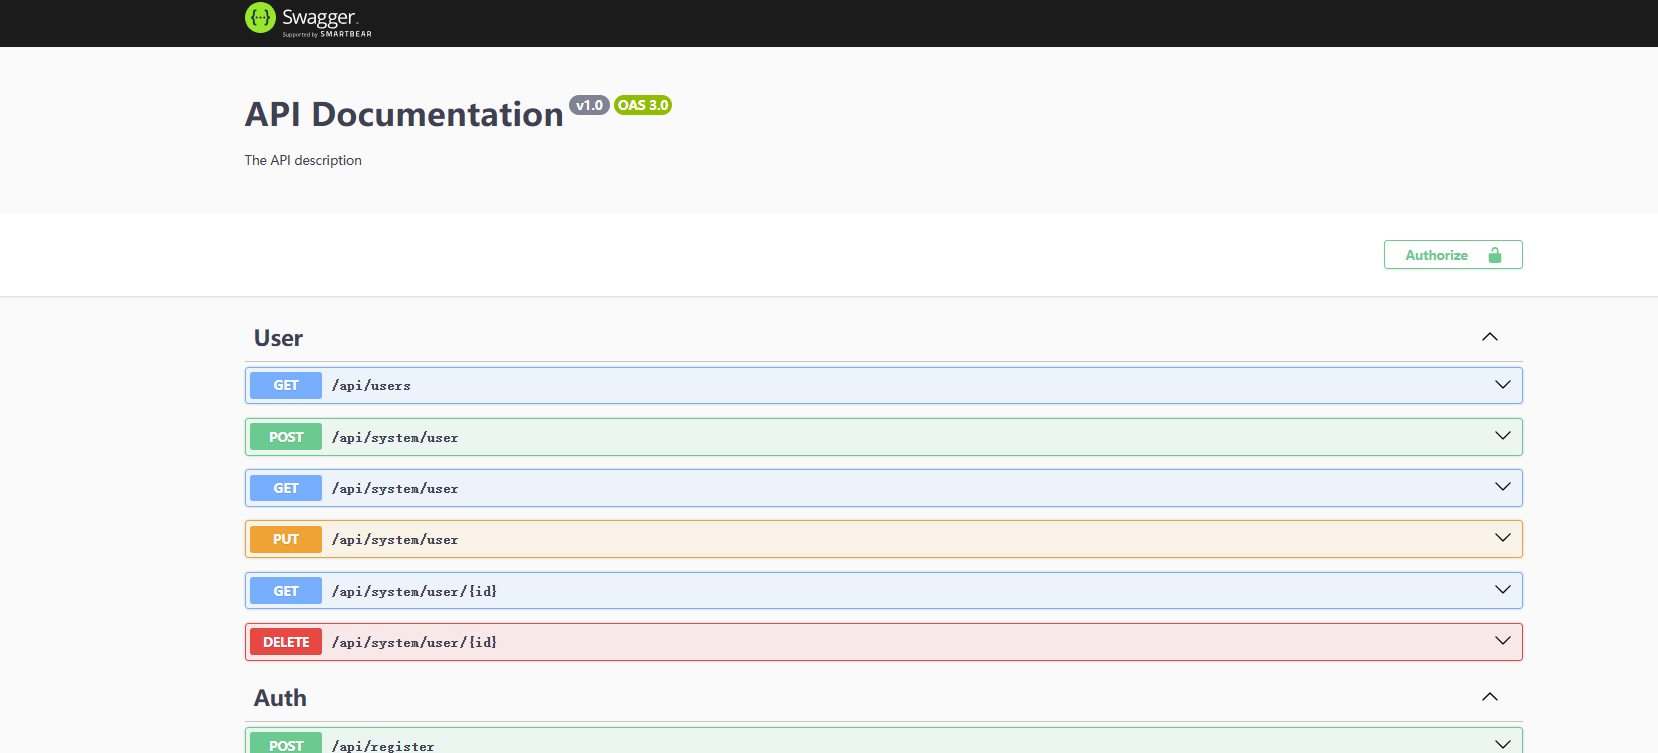
👉文档地址
打开查看我们的文档地址,我设置的端口号为8888
javascript
http://localhost:8888/swagger这个时候已经可以看到我们的文档了
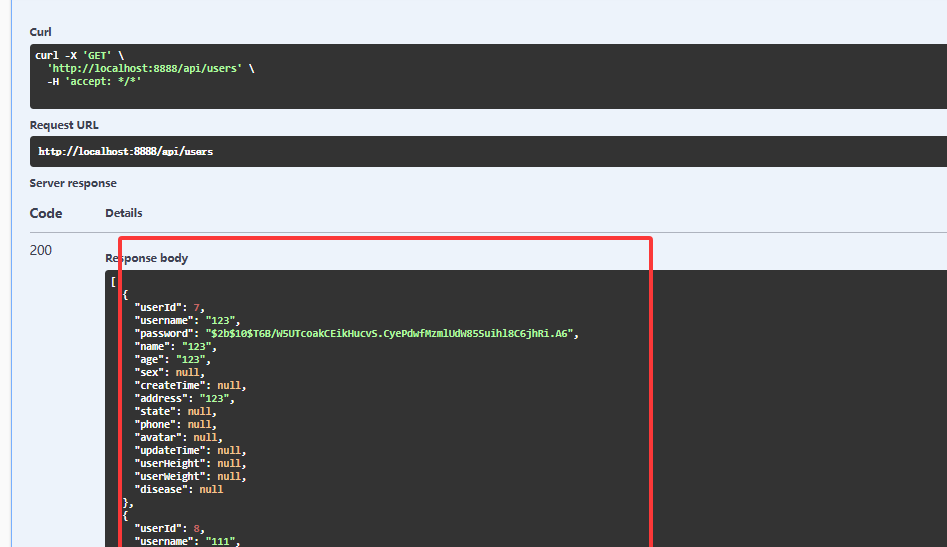
👉Execute执行查看返回结果
点击执行以后返回结果就会显示到我们这里
👉自定义Swagger配置
使用@ApiProperty()装饰器来描述DTO对象的属性
javascript
import { ApiProperty } from '@nestjs/swagger';
export class CreateUserDto {
  @ApiProperty({
    description: 'The name of the user',
    example: 'John Doe',
  })
  username: string;

  @ApiProperty({
    description: '密码必须是6位以及以上',
    example: '123456',
  })
  password: string;
}
👉自定义Get请求参数
请求参数的更改我们前面使用 ApiOperation描述最上面的使用ApiQuery即可 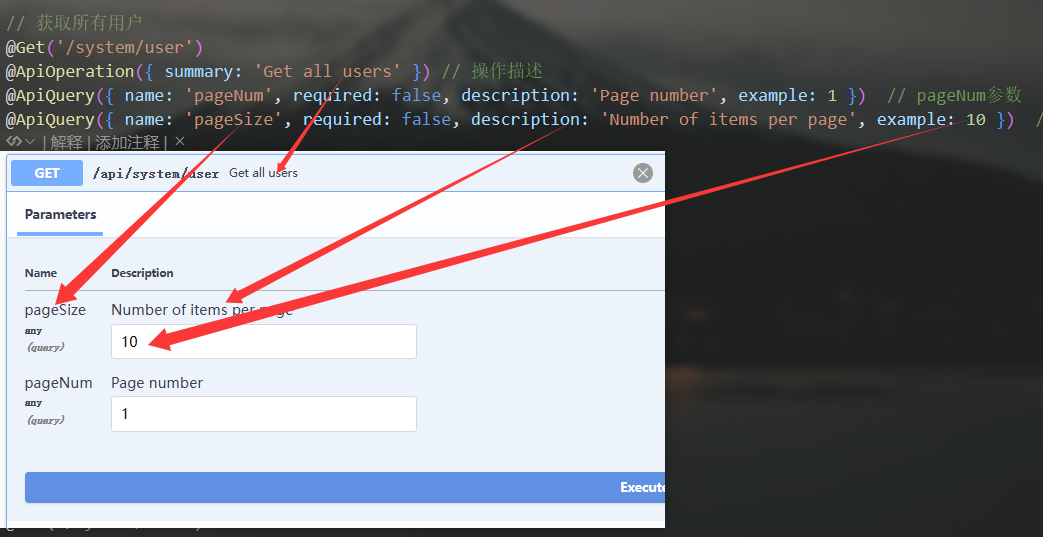
👉自定义post参数示例
javascript
@ApiProperty({description: '用户密码(必须是6位及以上)',example: '123456'})展示的时候 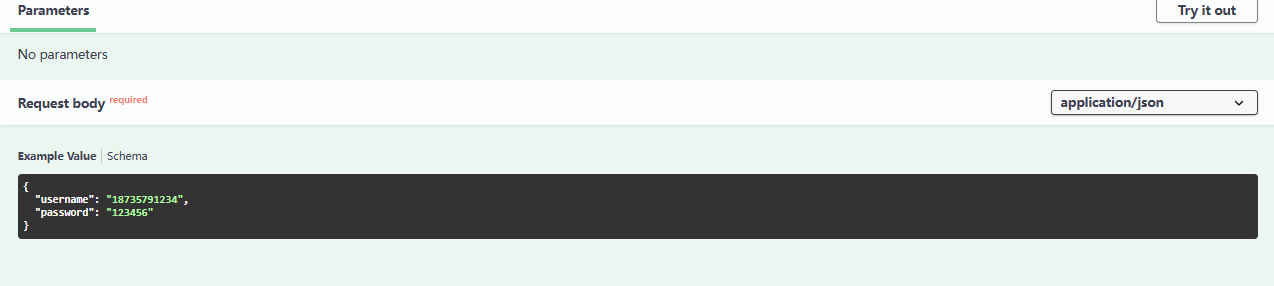
javascript
{
  "username": "18735791234",
  "password": "123456"
}
👉定义返回参数
@ApiResponse 装饰器来定义 GET 请求返回参数的含义
javascript
export class ResponseUserDto {
  // 定义一个响应数据传输对象
  @ApiProperty({
    description: 'The status code of the response',
    example: 200,
  })
  // 定义响应状态码
  code: number;

  @ApiProperty({
    description: 'The data returned by the API',
    type: [UserDto], // 表示返回的数据是一个 DataDto 数组
  })
  // 定义返回的数据
  data: UserDto[];

  @ApiProperty({
    description: 'The message describing the result',
    example: 'Success',
  })
  // 定义返回的消息
  message: string;
}


// 返回数据的类型
@ApiResponse({
  status: 200,
  description: '成功返回数据',
  type: User, // 指定返回的数据类型
})
到时候给我们返回的案例
javascript
{
  "code": 200,
  "data": [
    {
      "username": "18735791234",
      "password": "123456"
    }
  ],
  "message": "查询成功"
}
👉返回参数显示隐藏
用到@Expose() 显示字段以及 @Exclude() 隐藏字段
javascript
import { Exclude, Expose } from 'class-transformer';

@Expose()  // 显示字段
@ApiProperty({
  description: '用户密码(必须是6位及以上)',
  example: '123456',
  required: true, // 必填
})
password: string;
required: true; // 必填


@Exclude()  // 隐藏字段
@ApiProperty({
  description: '用户年龄',
  example: 17,
  required: false, // 必填
})
age: number;
服务层过滤
javascript
import { UserDto} from '@/common/pipes/user.dto';

async findAll(): Promise<UserDto[]> {
  // 调用userRepository的find方法,返回一个User数组
  // return this.userRepository.find();
  const users = await this.userRepository.find();
  return users.map(user => plainToClass(UserDto, user, { excludeExtraneousValues: true }));
}
这个时候给我们返回的数据
javascript
[
  {
    "username": "123",
    "password": "$2b$10$T6B/W5UTcoakCEmlUdW85Suihl8C6jhRi.A6"
  },
  {
    "username": "21323123123",
    "password": "$EumIdh24Dr55QVkhXKbaiMBTuiVo3.bwu"
  },
  {
    "username": "1221112",
    "password": "$2b$10$kHucvS.CyePdwfMzmlUdW85Suihl8C6jhRi.A6"
  }
]